Once upon a time, the location of the three switches operating my auxiliary lights used to be home to my HKS electronic boost controller. When I needed a place for the switches, it was the obvious choice, which meant the boost controller needed a new home.
Here it is, back in the day:

It was mounted simply, with double-sided tape, stuck directly to the switch blanks. I looked all around the cockpit for another place to stick it, but no flat surfaces were available. I’d have to build a bracket.
I chose the spot where the big navigation screen used to be mounted - just above the middle vents. It isn’t a flat surface - in fact it curves downwardsandhas a step as it moves over the dash onto the vent surround.
I took some rough measurements and cut a basic shape from thin aluminum.

A little bending, a little test fitting, a little more bending…

I wanted to account for the step in the dash before I bent in the side pieces, and you can see it taking form in the above picture.
When I was happy with it, I bent in the side pieces, trimmed off the excess, and riveted it together to make a gusset. Though it is very thin aluminum, the shape is quite strong.

The sharp edges were sanded down, and as a quick aesthetic treatment I covered the back side in some tarp tape I had laying around. This will keep the bracket from showing up in the windshield reflection. Paint would have been better, but I didn’t want to wait for it to dry.

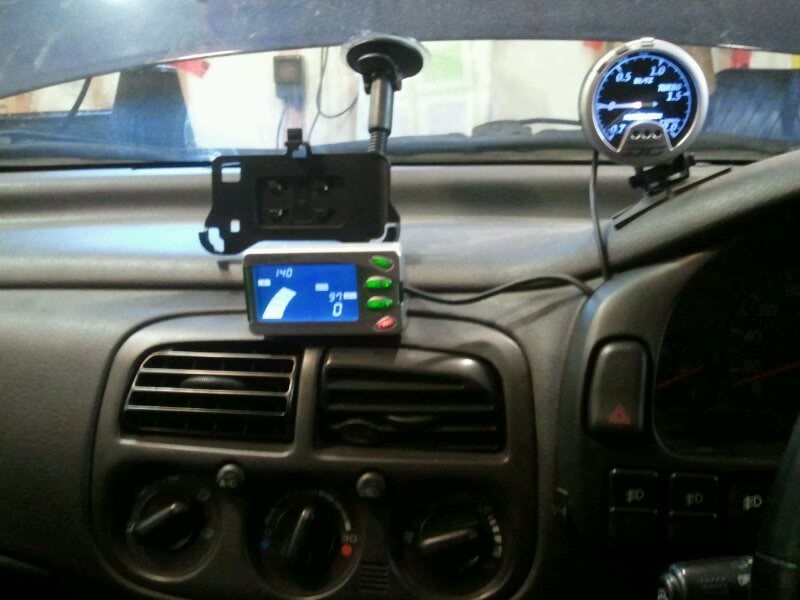
All the surfaces on the bracket, car, and controller were thoroughly cleaned with wax & grease remover. Two-sided tape was added, and voila…

Speaking of two-sided tape, the foamy stuff is always better than the flat stuff. By having some squishiness to it, the mating surfaces don’t have to be perfectly flat like they do with flat tape.
Well, the controller is mounted - but I’m not 100% happy with it. With the boost gauge, controller, and cell phone holder, my dash is just way too busy and disorganized. I think I will remake this when I have more time and mount it immediately next to the boost gauge.
Cost breakdown:
$2 - two sided tape (dealextreme)
Incidental supplies:
aluminum from my scrap pile
rivets
tarp tape
Here it is, back in the day:

It was mounted simply, with double-sided tape, stuck directly to the switch blanks. I looked all around the cockpit for another place to stick it, but no flat surfaces were available. I’d have to build a bracket.
I chose the spot where the big navigation screen used to be mounted - just above the middle vents. It isn’t a flat surface - in fact it curves downwardsandhas a step as it moves over the dash onto the vent surround.
I took some rough measurements and cut a basic shape from thin aluminum.

A little bending, a little test fitting, a little more bending…

I wanted to account for the step in the dash before I bent in the side pieces, and you can see it taking form in the above picture.
When I was happy with it, I bent in the side pieces, trimmed off the excess, and riveted it together to make a gusset. Though it is very thin aluminum, the shape is quite strong.

The sharp edges were sanded down, and as a quick aesthetic treatment I covered the back side in some tarp tape I had laying around. This will keep the bracket from showing up in the windshield reflection. Paint would have been better, but I didn’t want to wait for it to dry.

All the surfaces on the bracket, car, and controller were thoroughly cleaned with wax & grease remover. Two-sided tape was added, and voila…
Speaking of two-sided tape, the foamy stuff is always better than the flat stuff. By having some squishiness to it, the mating surfaces don’t have to be perfectly flat like they do with flat tape.
Well, the controller is mounted - but I’m not 100% happy with it. With the boost gauge, controller, and cell phone holder, my dash is just way too busy and disorganized. I think I will remake this when I have more time and mount it immediately next to the boost gauge.
Cost breakdown:
$2 - two sided tape (dealextreme)
Incidental supplies:
aluminum from my scrap pile
rivets
tarp tape
No comments:
Post a Comment