I’ve never been able to afford to buy beer in the quantities and qualities I deserve, so a while back I started making it myself! I used to bottle it, but putting it into kegs is actually much easier (not to mention that it’s just way more awesome having beer on tap). This is all done in three easy steps over the course of three weeks.

You can see most of what is required in the picture above. On the left is a 5 gallon glass carboy, partly filled with water to let the city’s added chlorine evaporate overnight. Next to that is the primary fermenter (aka plastic bucket). On top of the primary is the best cleaning/sanitizing solution I have found, Star San.
At right are the two types of beer kits that I make. You can go really cheap and get the syrupy stuff in metal cans, or you can go all out and brew your own mash and add your own hops - these kits are somewhere between. They’re easy, and they’re delicious, and they’re reasonably priced at $40-50 each (making 23L of beer). The rule of thumb for wine and beer kits is: the more water you have to add, the poorer the quality of the kit. For the metal cans, you add a lot of water. For the Brew House kits, you add 8 liters. For the brown box Festa beers, you add none.
The first step is to clean/sanitize everything. You can go crazy with cleaning, but I have found that simply rinsing everything immediately after using it keeps it acceptably clean. Clean isn’t quite good enough, however - sanitizing is the key to consistently good beer. Sanitizing keeps the bacteria at bay. My sanitizing solution of choice is the Star San I mentioned earlier. It is diluted with water and everything is soaked in it.
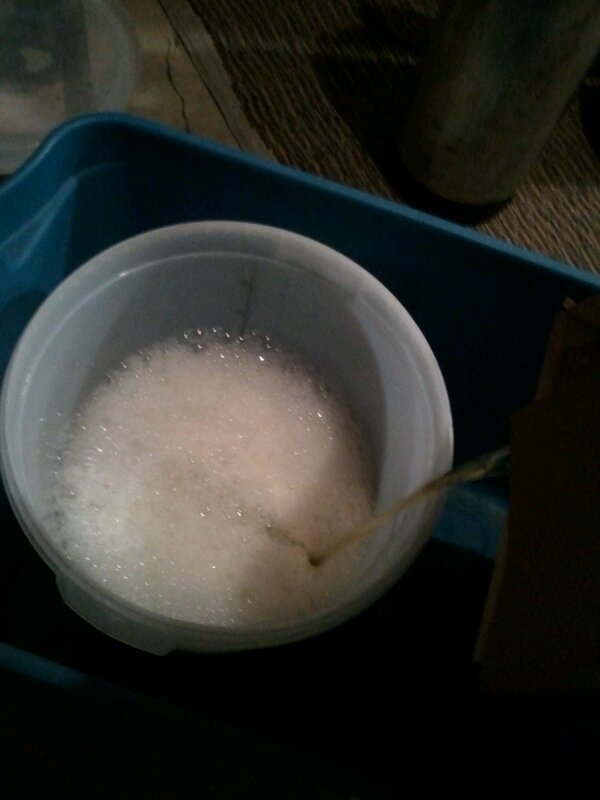
I pour a few inches of Star San solution into my primary, lid it, and shake it. I put my stirring spoon into a keg full of Star San. I leave these for at least 20 minutes, then dump the primary out. The brilliance of Star San is that you don’t need to rinse afterwards, which saves a lot of time and mess. Yes, there’s a soapy, bubbly residue, but it doesn’t affect the beer. Trust me. Don’t fear the foam.
Things are a little different at the first stage depending on the type of kit you’re using. Brew House kits come with a small packet ofcocaine some white power that needs to be added first. Sprinkle that into the bucket, add a few liters of water, and shake it all about. Festa kits skip this step.
Next we need to add the wort (the malted barley solution, the liquid in your kit!). Pouring a giant box of liquid isn’t easy, but Brew House kits come with a convenient cutout to hold the spout in place while you pour. Festa kits don’t have this, so I cut a hole in the top of the box to make it work. They all come with these silly little pop-off caps, which can be a little difficult to remove without losing some wort and making a mess. That is, they were difficult until I got the right tool for the job. For the $2 or so that these tools cost, I wish I had one of these from the start! (tool is red thingy at left, cap is the yellow part poking through the hole in the box):

Pour!

Then, if it’s a Brew House kit, add water up to the 23L mark and mix with your giant sanitized spoon. I apparently don’t have pics of the spoon, but it’s a two foot long plastic spoon sold at brew shops. Festa Brew kits don’t need mixing.
All that’s left is to sprinkle the yeast that came with your kit on top of the wort. Try to spread it out evenly so it gets slowly rehydrated by the liquid without clumping.

Put on your lid, set it up on a shelf, and you’re done with the first step.
ONE WEEK LATER, it’s time for step two. This one’s easy - all we need to do is get the beer off of the yeast that has died and sunk to the bottom of the fermenter. This improves the taste. We do this by siphoning.
Wait just a second there partner! You can’t siphon without sanitizing your equipment. Sanitizing is key! I sanitize the siphon and the secondary fermenter (carboy) at once by siphoning some Star San from a keg.

Yeah, my basement is messy. I like it that way.
With an inch or two of Star San in the carboy, give it a good shake. Don’t fear the foam! Pro tip: lids from big water bottles also work on glass carboys. Also, invest in one of these red carboy handles - it makes moving it much easier.

Leave the sanitizer in the carboy and leave the siphon in the Star San keg for at least 20 minutes, then drain the Star San out. Start siphoning beer from the bucket into the carboy, trying not to disturb the yeast on the bottom of the bucket. (the beer is hiding behind a bucket of wine in this pic - same equipment for both!)

Another pro tip: though I didn’t take any detailed photos of it, the siphon I use is awesome! It’s an auto-siphon, and it means you don’t have to put your bacteria-laden mouth on the hose to get the siphon started, thus keeping your beer more sanitized (any bacteria will breed like crazy in unfermented beer and make it taste nasty). Ask for one at your local brew shop.
Once the siphon is finished, you should have a carboy of slightly cleared beer, and a bucket full of dead yeast.

Put a fermentation lock on the beer, put it up on a shelf, and clean the yeast out of your bucket. I simply give the bucket a good rinse and a wipe down with a clean rag (no soap), then rinse the siphon parts separately and run some clean water through the hoses. That’s it for step two.
TWO WEEKS LATER (three weeks from the start) it’s time to carbonate. If you’re kegging, this is dead easy! If you’re bottling, this is the most labour intensive part of the whole thing.
Guess what we have to do first… go on, guess. If you guessed sanitize everything, you’re right! Sanitize the siphon and any bottles you might be using. Since my beer batch is 23L and my keg only holds 19L, I sanitize four 1L swing-top bottles.This takes care of the bottles and the siphon, and since I usually leave sanitizer in my kegs when they’re not full of beer, they come pre-sanitized.

Now about that carbonation: there are two methods of carbonating. Forcing pressurized carbon dioxide into the beer, or restarting those yeast cells and getting them to produce the carbon dioxide. Just like us humans as we breathe, yeast also produces CO2. They eat sugar, and produce alcohol and CO2.
At this point, most of the sugars in the beer have been eaten up and most of the yeast cells have died and sunk to the bottom of our fermenter. There are a few left in the beer, however, and they are hungry! We need to feed them some sugar. Not just regular table sugar, however, we need to feed them dextrose (corn sugar) which doesn’t sweeten or change the flavour of the beer. If you bought a Brew House kit it comes with a dextrose packet - if it’s a Festa kit then you have to supply your own.
How much do you add? It depends on how carbonated you like it. There are complicated formulas based on the type of beer and the specific weight of the dextrose, but I just ballpark it and add about 1 heaping tablespoon per liter. It’s a bit on the high side, but I like a carbonated beer.
Add the sugar to the bottles.

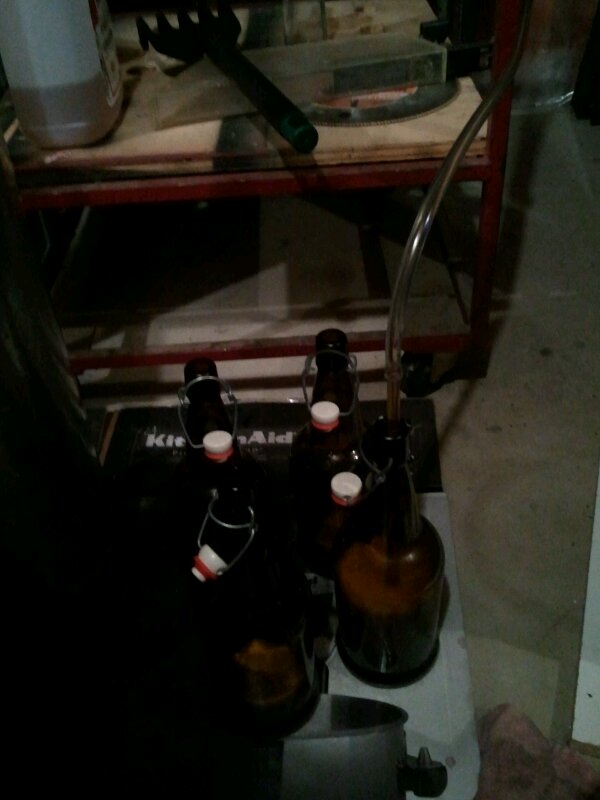
Then siphon the beer into the bottles. A bottling wand on the end of your siphon hose helps here - it automatically stops the flow of liquid when it is lifted off the bottom of the bottle. Ask your brew shop for one.

Cap the bottles and give them a good shake to mix up the dextrose. The rest of the beer goes in the sanitized keg.

Put the bottles on the shelf and they should be ready in another three weeks. Clean up your carboy and siphon, and put your keg in your fridge.
My fridge is a small freezer with the freezer thermostat swapped out for a fridge thermostat. This is way more efficient than a conventional fridge because freezers tend to be better insulated, and the top-loading nature of it keeps the cold from falling out every time you open the door.

The other parts of the carbonating setup are a CO2 bottle and a regulator. My regulator is also my welding regulator - it gets shared between beer and welding. This has the secondary benefit of keeping my welds straighter, if you know what I mean. (hint: sober welds are better welds)
From the CO2 bottle, we have a CO2-bottle-to-argon-regulator adapter, then the regulator, then a quick-connect air line fitting for quick swaps to welding duty, then a tee with a 0-30psi gauge, then a hose to a keg connector, and finally the keg full of delicious beer.
You’ll notice there are two gauges on the regulator already - one indicates the pressure in the bottle. This will actually stay constant until the liquid CO2 is gone, at which point the gas pressure will quickly drop. It’s fairly useless as an indicator of how much gas you have left. The other regulator gauge indicates how much gas is flowing per minute, which doesn’t do us any good in a beer setup - hence the need for the third 0-30psi gauge to actually see keg pressure. The regulator can be adjusted to provide the exact gas pressure you want.
Again, if you’re really really into beer and want it to be absolutely perfect, there are complicated formulas based on the temperature of the beer, the type of beer, and the gas pressure to make it carbonated to your exacting standards. I just use 15psi for everything. Purists, look away.
Alright, now depending on how impatient you are, you will have carbonated beer in a day or a week. If you just let it sit in the fridge at 15psi, you will wait a week. If you are out of beer and just have to have it as soon as possible, you can shake the keg vigorously until your arms fall off. When your arms have recovered, shake again, and again, and again. Then shake again. It’s a lot of work, but you can have carbonated beer in a day if you’re tenacious.
When it’s ready, hook up a tap, and serve yourself some cold delicious homebrew beer!
This is a quick guide on how I make beer. There are other methods, but I find this is a fairly low effort/high reward ratio. It’s not a hobby for me as it is for some, it’s just a way to get great beer for cheap.
I would recommend that you try it out. You can get a starter kit from most beer/wine homebrew shops for about $50. Add in a few little extras and a kit and your investment is still pretty minimal. Start with bottling and see how you like it - if it’s something you think you can do, move up to kegging!
Cost breakdown:
per batch: $40-50 for a kit that produces about 60 bottles of GOOD beer
basic equipment: about $60
kegging equipment:
$40 - used freezer
$10 - fridge thermostat
$100 - CO2 bottle
$60 - CO2 regulator
$20 - hose, tap and fittings
$40/ea - decommissioned Pepsi kegs (I use 3 for constant beer production, could get away with 1 or 2)
==$350 kegging total (but it makes it so much easier and tastier!)

You can see most of what is required in the picture above. On the left is a 5 gallon glass carboy, partly filled with water to let the city’s added chlorine evaporate overnight. Next to that is the primary fermenter (aka plastic bucket). On top of the primary is the best cleaning/sanitizing solution I have found, Star San.
At right are the two types of beer kits that I make. You can go really cheap and get the syrupy stuff in metal cans, or you can go all out and brew your own mash and add your own hops - these kits are somewhere between. They’re easy, and they’re delicious, and they’re reasonably priced at $40-50 each (making 23L of beer). The rule of thumb for wine and beer kits is: the more water you have to add, the poorer the quality of the kit. For the metal cans, you add a lot of water. For the Brew House kits, you add 8 liters. For the brown box Festa beers, you add none.
The first step is to clean/sanitize everything. You can go crazy with cleaning, but I have found that simply rinsing everything immediately after using it keeps it acceptably clean. Clean isn’t quite good enough, however - sanitizing is the key to consistently good beer. Sanitizing keeps the bacteria at bay. My sanitizing solution of choice is the Star San I mentioned earlier. It is diluted with water and everything is soaked in it.
I pour a few inches of Star San solution into my primary, lid it, and shake it. I put my stirring spoon into a keg full of Star San. I leave these for at least 20 minutes, then dump the primary out. The brilliance of Star San is that you don’t need to rinse afterwards, which saves a lot of time and mess. Yes, there’s a soapy, bubbly residue, but it doesn’t affect the beer. Trust me. Don’t fear the foam.
Things are a little different at the first stage depending on the type of kit you’re using. Brew House kits come with a small packet of
Next we need to add the wort (the malted barley solution, the liquid in your kit!). Pouring a giant box of liquid isn’t easy, but Brew House kits come with a convenient cutout to hold the spout in place while you pour. Festa kits don’t have this, so I cut a hole in the top of the box to make it work. They all come with these silly little pop-off caps, which can be a little difficult to remove without losing some wort and making a mess. That is, they were difficult until I got the right tool for the job. For the $2 or so that these tools cost, I wish I had one of these from the start! (tool is red thingy at left, cap is the yellow part poking through the hole in the box):

Pour!
Then, if it’s a Brew House kit, add water up to the 23L mark and mix with your giant sanitized spoon. I apparently don’t have pics of the spoon, but it’s a two foot long plastic spoon sold at brew shops. Festa Brew kits don’t need mixing.
All that’s left is to sprinkle the yeast that came with your kit on top of the wort. Try to spread it out evenly so it gets slowly rehydrated by the liquid without clumping.

Put on your lid, set it up on a shelf, and you’re done with the first step.
ONE WEEK LATER, it’s time for step two. This one’s easy - all we need to do is get the beer off of the yeast that has died and sunk to the bottom of the fermenter. This improves the taste. We do this by siphoning.
Wait just a second there partner! You can’t siphon without sanitizing your equipment. Sanitizing is key! I sanitize the siphon and the secondary fermenter (carboy) at once by siphoning some Star San from a keg.

Yeah, my basement is messy. I like it that way.
With an inch or two of Star San in the carboy, give it a good shake. Don’t fear the foam! Pro tip: lids from big water bottles also work on glass carboys. Also, invest in one of these red carboy handles - it makes moving it much easier.

Leave the sanitizer in the carboy and leave the siphon in the Star San keg for at least 20 minutes, then drain the Star San out. Start siphoning beer from the bucket into the carboy, trying not to disturb the yeast on the bottom of the bucket. (the beer is hiding behind a bucket of wine in this pic - same equipment for both!)

Another pro tip: though I didn’t take any detailed photos of it, the siphon I use is awesome! It’s an auto-siphon, and it means you don’t have to put your bacteria-laden mouth on the hose to get the siphon started, thus keeping your beer more sanitized (any bacteria will breed like crazy in unfermented beer and make it taste nasty). Ask for one at your local brew shop.
Once the siphon is finished, you should have a carboy of slightly cleared beer, and a bucket full of dead yeast.

Put a fermentation lock on the beer, put it up on a shelf, and clean the yeast out of your bucket. I simply give the bucket a good rinse and a wipe down with a clean rag (no soap), then rinse the siphon parts separately and run some clean water through the hoses. That’s it for step two.
TWO WEEKS LATER (three weeks from the start) it’s time to carbonate. If you’re kegging, this is dead easy! If you’re bottling, this is the most labour intensive part of the whole thing.
Guess what we have to do first… go on, guess. If you guessed sanitize everything, you’re right! Sanitize the siphon and any bottles you might be using. Since my beer batch is 23L and my keg only holds 19L, I sanitize four 1L swing-top bottles.This takes care of the bottles and the siphon, and since I usually leave sanitizer in my kegs when they’re not full of beer, they come pre-sanitized.

Now about that carbonation: there are two methods of carbonating. Forcing pressurized carbon dioxide into the beer, or restarting those yeast cells and getting them to produce the carbon dioxide. Just like us humans as we breathe, yeast also produces CO2. They eat sugar, and produce alcohol and CO2.
At this point, most of the sugars in the beer have been eaten up and most of the yeast cells have died and sunk to the bottom of our fermenter. There are a few left in the beer, however, and they are hungry! We need to feed them some sugar. Not just regular table sugar, however, we need to feed them dextrose (corn sugar) which doesn’t sweeten or change the flavour of the beer. If you bought a Brew House kit it comes with a dextrose packet - if it’s a Festa kit then you have to supply your own.
How much do you add? It depends on how carbonated you like it. There are complicated formulas based on the type of beer and the specific weight of the dextrose, but I just ballpark it and add about 1 heaping tablespoon per liter. It’s a bit on the high side, but I like a carbonated beer.
Add the sugar to the bottles.

Then siphon the beer into the bottles. A bottling wand on the end of your siphon hose helps here - it automatically stops the flow of liquid when it is lifted off the bottom of the bottle. Ask your brew shop for one.
Cap the bottles and give them a good shake to mix up the dextrose. The rest of the beer goes in the sanitized keg.

Put the bottles on the shelf and they should be ready in another three weeks. Clean up your carboy and siphon, and put your keg in your fridge.
My fridge is a small freezer with the freezer thermostat swapped out for a fridge thermostat. This is way more efficient than a conventional fridge because freezers tend to be better insulated, and the top-loading nature of it keeps the cold from falling out every time you open the door.

The other parts of the carbonating setup are a CO2 bottle and a regulator. My regulator is also my welding regulator - it gets shared between beer and welding. This has the secondary benefit of keeping my welds straighter, if you know what I mean. (hint: sober welds are better welds)
From the CO2 bottle, we have a CO2-bottle-to-argon-regulator adapter, then the regulator, then a quick-connect air line fitting for quick swaps to welding duty, then a tee with a 0-30psi gauge, then a hose to a keg connector, and finally the keg full of delicious beer.
You’ll notice there are two gauges on the regulator already - one indicates the pressure in the bottle. This will actually stay constant until the liquid CO2 is gone, at which point the gas pressure will quickly drop. It’s fairly useless as an indicator of how much gas you have left. The other regulator gauge indicates how much gas is flowing per minute, which doesn’t do us any good in a beer setup - hence the need for the third 0-30psi gauge to actually see keg pressure. The regulator can be adjusted to provide the exact gas pressure you want.
Again, if you’re really really into beer and want it to be absolutely perfect, there are complicated formulas based on the temperature of the beer, the type of beer, and the gas pressure to make it carbonated to your exacting standards. I just use 15psi for everything. Purists, look away.
Alright, now depending on how impatient you are, you will have carbonated beer in a day or a week. If you just let it sit in the fridge at 15psi, you will wait a week. If you are out of beer and just have to have it as soon as possible, you can shake the keg vigorously until your arms fall off. When your arms have recovered, shake again, and again, and again. Then shake again. It’s a lot of work, but you can have carbonated beer in a day if you’re tenacious.
When it’s ready, hook up a tap, and serve yourself some cold delicious homebrew beer!
This is a quick guide on how I make beer. There are other methods, but I find this is a fairly low effort/high reward ratio. It’s not a hobby for me as it is for some, it’s just a way to get great beer for cheap.
I would recommend that you try it out. You can get a starter kit from most beer/wine homebrew shops for about $50. Add in a few little extras and a kit and your investment is still pretty minimal. Start with bottling and see how you like it - if it’s something you think you can do, move up to kegging!
Cost breakdown:
per batch: $40-50 for a kit that produces about 60 bottles of GOOD beer
basic equipment: about $60
kegging equipment:
$40 - used freezer
$10 - fridge thermostat
$100 - CO2 bottle
$60 - CO2 regulator
$20 - hose, tap and fittings
$40/ea - decommissioned Pepsi kegs (I use 3 for constant beer production, could get away with 1 or 2)
==$350 kegging total (but it makes it so much easier and tastier!)
No comments:
Post a Comment